Free Ground Shipping on Orders Over $49 Details & Exclusions Excludes Curb Side Delivery (LTL). Lower 48 United States Only. • NEW! Shop The Summer Lookbook
Oct 21, 2013
How to Install Under-Cabinet Kitchen Lighting
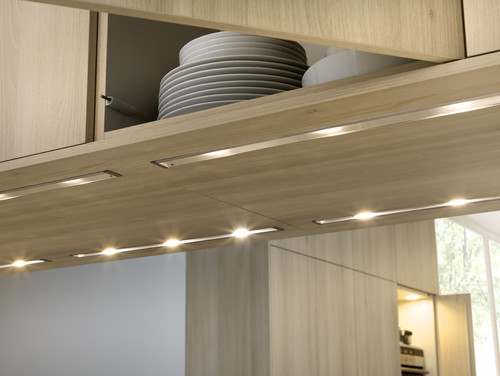
Good lighting can make a very big difference to your kitchen. Accentuate your countertops and brighten up dark spaces by installing under-cabinet lighting. With these detailed instructions, you can easily install your kitchen cabinet lights without having to hire an electrician.
TOOLS:
Flat pry bar
Phillips and slotted screwdrivers
Drywall saw
1/2-inch spade bit
Wire strippers
Lineman’s pliers
Drill/driver
MATERIALS:
Kitchen light fixture
Dimmer switch
GFCI receptacle
Two-gang, old-work electrical box
Two-gang wall plate
12/2 NM (nonmetallic) electrical cable plastic-sheathed cable
Wire connectors
Wood or plastic cable protector
Step 1: Remove Old Electrical Box
Before you start, turn off the electricity in your kitchen from the main electrical panel. Unscrew the wall plate, disconnect the wires from the receptacle, and remove this from the electrical box. Hold a two-gang, old-work electrical box over the current box in the wall, then trace around it using a pencil. Following the outline, cut a bigger hole for the new electrical box. Make sure that the cable coming into the electrical box is loose. Use a flat pry bar to remove the old box.
Step 2: Install Light Fixture
With a ½-inch-diameter spade bit, drill through the wall just below the upper wall cabinet. Cut a 12/2 NM electrical cable long enough to reach from the ½-inch hole to the two-gang box hole, then add 24 inches to this length. Insert one end of the cable into the ½-inch hole bored in the upper backsplash wall. Then reach into the hole where the new electrical box will be placed, grab the cable end, and pull it out. Hold the fixture against the underside of the cabinet, place it just behind the cabinet’s front edge. Screw the fixture to the cabinet.
Step 3: Install New Electrical Box
From the end of the cable, strip away 6 inches of the outer plastic sheathing and feed the cable through the connector. Secure the cable by tightening the connector screws. The connector should clamp down on the cable’s plastic sheathing, not on the individual wires. Hold the new, two-gang electrical box close to the hole you cut in the backsplash wall. Insert the end of the existing cable (the one attached to the receptacle) into the two-gang box. Pull the end of the cable coming from the light fixture into the box. Push the box into the hole and press it tightly against the wall. Tighten the screws until you feel the fins pull tight against the back of the drywall, locking the box in place.
Step 4: Install GFCI Outlet
Connect the bare copper grounding wires from both the existing and new cable with a green pigtail connector. From the remaining cable, separate the white wire and cut two 8-inch pieces. Strip ½ inch of insulation from their ends and connect them to both white wires in the box with a wire connector. Tighten the other end of one of the 8-inch white wires onto the silver GFCI screw terminal marked “white-wire line.” Cut two 8-inch-long black wires, strip off ½ inch of insulation, and connect them to the black wire from the existing cable. Tighten the free end of one of these wires to “hot-wire line” GFCI terminal. Wrap the pigtail around the green grounding screw on the GFCI, and leave at least 4 inches of wire sticking out from the screw. Peel off the plastic sheathing with lineman’s pliers before screwing on wire connectors.
Step 5: Connect New Dimmer Switch
Using a wire connector, grab the loose end of the remaining 8-inch black wire and connect it to the black wire on the dimmer switch. Attach the dimmer’s yellow wire to the black wire from the newly installed light fixture. Connect the bare copper ground wire coming from the GFCI to the dimmer’s green grounding wire, and the last white wire to the dimmer’s white wire using the wire connector. Fold the spare wires into the box and secure the GFCI and dimmer switch with the screws provided.
Step 6: Finalize Fixture and Wall Plate
Reinstall the socket strip in the fixture. Inside each fixture, there are white, black, and green wires. Connect these to the wires of the same color coming from the cable, using wire connectors. Add the bulbs to the socket strip, mount the cover on the fixture, and screw on the two-gang wall plate.